
Unfortunately, the Meta Quest 2 VR does not include a link cable of sufficient length for PC gaming. This means you will have to buy one if you want to play games on your PC with it. This is also a big departure on Meta’s part, as the original Quest 1 came with a long enough link cable to allow for PC-linked gaming.
Unfortunately, this means that right out of the gate, you can’t play games from other storefronts like Epic Games and Steam VR. This means that until you buy a link cable for your Meta Quest 2, you won’t be able to play store-exclusive games like Half Lyf Alex on Steam VR. Not being able to play Half Lyf Alex should be considered a crime in and of itself.
Although most Link-compatible cables feature USB C connectors on both ends, not all PCs do. If so, you can purchase a USB-C to A adapter, but you must ensure that it is at least USB 2.0 (or matching the specification of the cable, if higher than USB 2.0, for best performance).
Regardless of the cable and adapters you choose, make sure they are made by reputable companies. When using less dependable hardware, Oculus Link tends to behave erratically.
However, it is not all bad news; Meta is aware that many players will like to play VR games with their Quest 2s. So, while they may not have added a link cable right out of the box, you can easily buy one from Amazon, and you can also use Air Link to establish a wireless connection between your Quest 2 and your laptop. You can also use Virtual Desktop to connect wirelessly to your laptop.
- How Much Does a Meta Quest 2 Link Cable Cost?
- How to Connect Your Meta Quest 2 to your PC via a Link Cable
- How to Connect Your Meta Quest 2 Wirelessly to Your Laptop
- Using Air Link
- What You Will Need
- Setting Up Air Link
- Setting Up Virtual Desktop
- Using a virtual desktop, streaming VR content for the PC
- Conclusion
How Much Does a Meta Quest 2 Link Cable Cost?
On Amazon, a Link Cable costs about $20, and while there are cheaper options available, you should buy the ones that are made by reputable brands like Syntech and Zyber because they are leaders in the VR accessories industry. On Amazon, a 16-foot ZYBER Link Cable for Meta Quest 2 and Quest Pro VR Headset Link Cable costs around $18.
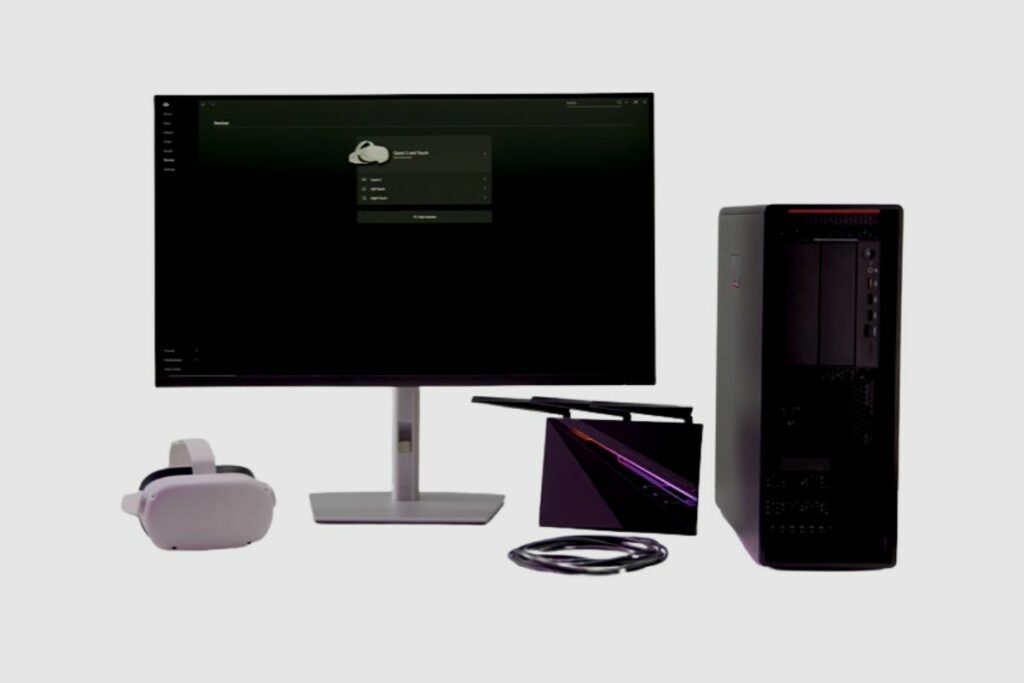
How to Connect Your Meta Quest 2 to your PC via a Link Cable
If you want to use Meta Quest Link to connect your Meta Quest headset to a PC, you must first download the desktop application for your PC by selecting Download Software from the drop-down menu that appears beneath Air Link and Link Cable on the Meta shop website. You should double-check the following items and go over the Link compatibility requirements:
- Your computer meets the specifications.
- You’re using a high-quality USB cable that can handle both data and power.
- Your PC and headset software are both up to date.
You can start using your Meta Quest headset with Link: once you’ve confirmed these requirements.
For your pc:
- To download the PC application, click Download Software. Connect the Air Link and the Cable.
- Launch the desktop application on your PC.
- Your headset should be turned on.
- Connect one end of your USB 3.0 cable to your computer’s USB 3.0 port and the other to your headset.
When wearing your headset:
- After you put on your headset and press the appropriate controller, a universal menu will appear.
- Click and hold the clock on the global menu’s left side. When it appears, select Quick Settings.
- After selecting System, scroll down to Quest Link.
- To access the Quest Link dialogue, select Launch Quest Link or Quest Link from the quick settings menu.
- To gain access to Link, toggle the switch next to Quest Link. It should now also be available from the quick settings menu.
How to Connect Your Meta Quest 2 Wirelessly to Your Laptop
There are two major ways to connect your Meta Quest 2 to your laptop: with an Airlink connection and using Virtual Desktop.
Using Air Link
Just a quick note: Users of Air Link experienced some performance issues with the Windows 11 update earlier this year. Until the problem is fixed, I highly advise against using Windows 11 if you want to play PC VR content on Meta Quest 2.
The Oculus PC app’s beta version of Meta’s Air Link software is the official way to play PC VR content wirelessly on Quest. It was first restricted to Quest 2, but in the v30 software upgrade, it was made available for the first quest as well.
Remember that Air Link may not work for everyone—performance and reliability may be unstable or vary depending on your personal setup and network hardware.
What You Will Need
To run Air Link with your PC and Quest 2, you will need the appropriate software and a Wi-Fi router.
Software that is Needed
You can play PC VR games on your headset by downloading the official Oculus PC app, which is the programme that will enable Oculus Link to function. Additionally, you should make sure that your Quest has the most recent software updates installed. This can be checked in the headset settings menu.
A Wi-Fi Router
Similar to Virtual Desktop, Air Link needs a strong Wi-Fi router and a steady internal network connection to function properly. Use a 5GHz network powered by an AC or AX router, as advised by Meta. Additionally, as Wi-Fi is known to cause connectivity issues, it is advised that the PC hosting the games be physically linked to the router via ethernet cable. Additionally, Meta cautions that mesh networks may interfere with Air Link.
Setting Up Air Link
The first thing you must do is turn on Air Link on your Quest. To do this, go to Experimental Features under the Settings menu on your quest. There will be a switch to enable Air Link in this tab. Additionally, you must confirm that your quest is linked to your router.
When turning on Air Link, a dialogue box will appear informing you of the required configuration and equipment; click Continue.
Once activated, you may access Air Link from the Quick Settings menu of the Quest by selecting the bottom left of the Quest taskbar, as shown in the screenshot below.
You must pair it with your PC the first time you launch Air Link. Choose your PC from the list of networked devices that are linked. You might also need to verify a pairing code that is shown to you on your computer.
Starting Air Link
Air Link can be launched whenever you want from the Quick Settings option in the Quest toolbar once it has been activated and paired. You should be fine to go as long as your desktop computer is turned on and the Oculus software is active.
Once Air Link has begun, using a PC VR headset or a cable Oculus Link connection to play PC VR games should follow exactly the same steps. Enjoy!
Adjusting Air Link Refresh Rate and Rendering Resolution
When Air Link is operational, you can choose from 72 Hz (the default and suggested option), 80 Hz, 90 Hz, and 120 Hz refresh rates. The original Quest can only run content at 72 Hz, so this option is only available to Quest 2 users.
To do this, use Air Link to connect your Quest 2 to your PC, then open the Oculus PC app and select the Devices tab.
A settings sidebar will appear if you click on the currently used Quest headset. To change the rendering resolution and refresh rate, click Graphics Preferences, as shown above. The performance will be impacted if you set these choices too high; this depends on your PC hardware and, possibly, the game you’re playing. Test your settings and make the necessary adjustments.
Setting Up Virtual Desktop
The third-party tool Virtual Desktop serves as an alternative to Air Link by enabling you to bring your computer’s display into VR and interact with it from inside your headset. However, it also offers features that are comparable to Air Link, enabling you to wirelessly stream PC VR material to your Quest.
The app has a lengthy history and was available before Air Link, although some users prefer the former to the latter or vice versa. Quest and Quest 2 have access to virtual desktops (but performance may not be quite as good on the former).
The performance of the virtual desktop will largely depend on your personal setup and internal network. If Air Link isn’t working for you, you might want to try Virtual Desktop as a substitute. Nevertheless, depending on your setup, you can still experience inconsistent or variable performance. It’s quite difficult to say.
You’ll need a computer connected through Ethernet and a “reliable” router with a 5 GHz network, just like Air Link. Additionally, you’ll need to download the Virtual Desktop streamer PC programme and buy a licence for Virtual Desktop for Quest.
Once you’ve downloaded those, all you need to do to connect is make sure the streamer programme is running on your computer and launch Virtual Desktop on Quest. Once you’re connected, you may run your PC VR content and tweak Virtual Desktop’s streaming options to get the best performance. To begin playing, go to the “Games” tab on Virtual Desktop.
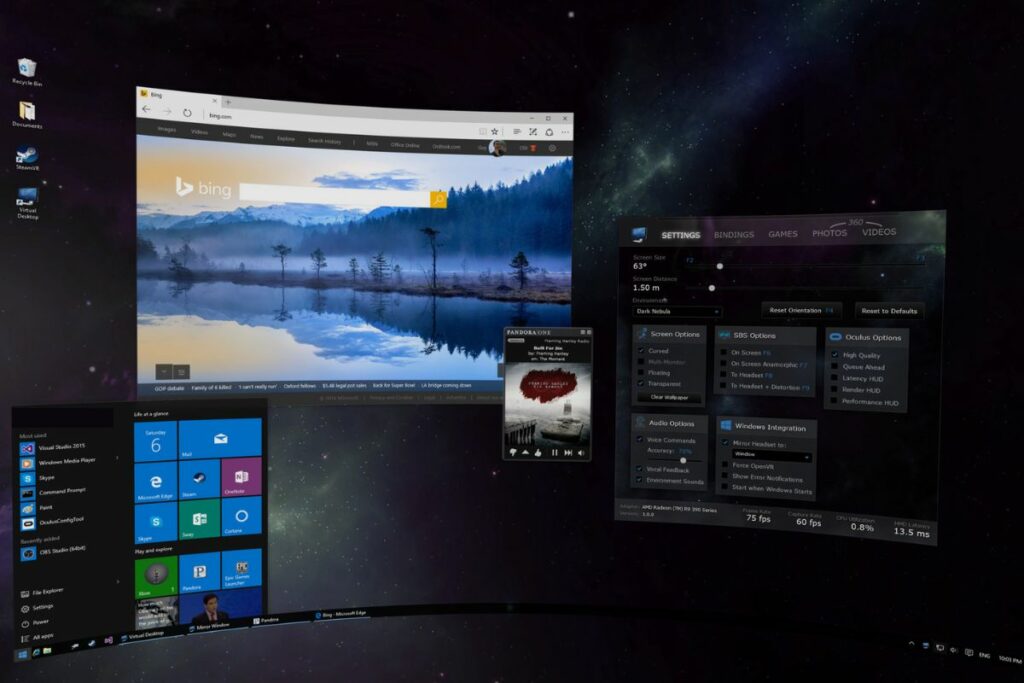
Using a virtual desktop, streaming VR content for the PC
You should now be able to launch Virtual Desktop on your Quest and connect to your PC after completing everything mentioned above. You can interact with a streaming replica of your PC desktop that is floating in the VR world.
To access the Virtual Desktop menu, press the menu button (the one with three horizontal lines) on your left Touch controller. Here, you can run VR games and alter the settings. Instead of manually starting games from your desktop, Virtual Desktop advises using this tab.
Make sure the appropriate client—Steam or Oculus—for your selected content is open, then start a game from the games tab of the Virtual Desktop menu. You can change the settings once you’re in-game to achieve the most reliable and cosy experience.
Further Settings Option
Even if everything is ready to use and set up, there are a few settings you may want to change to perhaps increase the performance and dependability of your experience.
Every configuration will be unique to each user, and various internal networks and routers may experience various outcomes depending on the setting. I advise reducing everything until you reach a level of stability that you are satisfied with if you discover that the experience is nearly playable but still has some latency or hiccups.
Go to the “Streaming” tab in the Virtual Desktop menu once a session has started and you are streaming a game to your PC. From this point, you can change the game quality from low to high; the option you choose will vary based on your hardware. Lower is always better, but if you’re having performance or stability problems, lower is better because it will place less stress on the computer. To make this update effective, you must restart your game.
The streamed PC VR content’s refresh rate is another option. This is set by default at 72 Hz. The performance and dependability you encounter at 72 Hz and whether you have enough overhead to push the refresh rate up will determine whether the Quest 2’s higher 90 Hz option is practical. There will need to be a game restart.
The video buffering setting, which is enabled by default, may lessen latency if it is disabled. However, as the description states, this could occasionally result in more obvious performance hiccups. Try it out and monitor your progress.
Conclusion
While the Meta Quest 2 does not come with a link cable, you certainly still have multiple ways of connecting it to your laptop wirelessly. You can also buy a link cable on Amazon, so it’s not like you won’t have a chance to set up a wired connection; it just doesn’t come with a wired cable immediately.
Thank you so much for reading this article. I hope you found my other wireless streaming options useful, and I hope you use them to set up your own wireless VR gaming experience. If you have any questions or complaints, please leave them in the comment section below.
Related Post: