
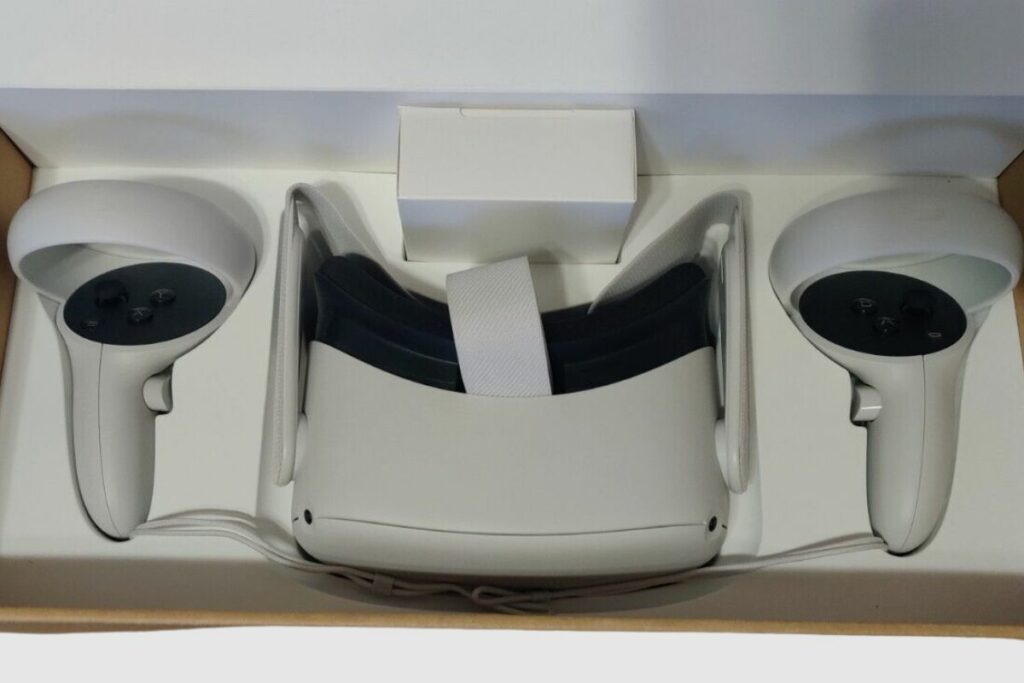
The Meta Quest 2 VR comes with two easy-to-use matching controllers inside the box when you buy a brand-new Meta Quest 2. The controllers for the Meta Quest 2 allow you to interact with the 3D virtual worlds you’re immersed in.
Even for totally simple things like picking up a lightsaber or other objects, the controllers will always make you feel like you are a part of the world you’re playing in. It comes with multiple triggers, buttons, and Joycons on each controller, and they allow you to do a lot of things.
Battery Life on the Meta Quest 2 Controllers
Each controller is powered by a single AA battery, and the battery life will last you well over six months, depending on how much you use them. I’ve had mine for about a year, and I have only started to see notifications in the Quest app to replace the batteries for the controllers.
I like that when you have the headsets on, it is easy to check the battery level of the controllers, either in settings or by looking down at the controllers. The Quest will generate a virtual version of your physical controller with the battery level of each controller displayed on top of them.
How to Change the Batteries on Your Controllers
To change the batteries on your Meta Quest 2 controller, you will need to turn the large round part of it to face your body with the grip button facing down. Then place one thumb at the top on the edge of the controller, and then place one thumb in the middle, and then you will need to push the cover away from your body to slide the cover off. You can also change your wrist loops from there by sliding them off from the base of the controllers.
How to Pair the Meta Quest 2 Controllers to the Headset?
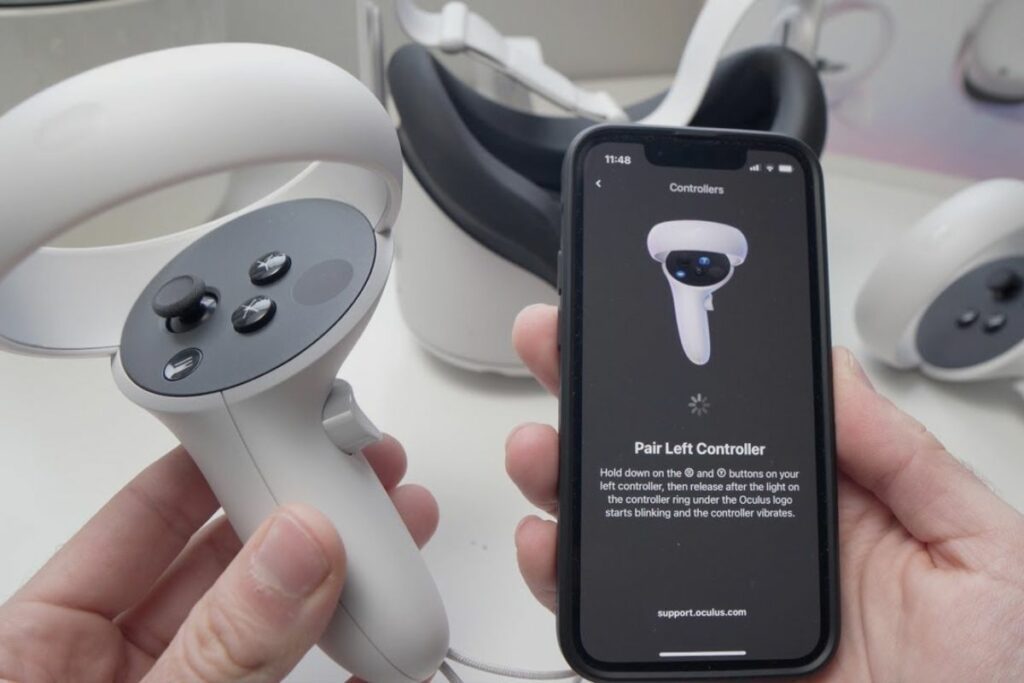
To pair your Meta Quest 2 Controllers with your headset, you must do so through the Quest app. So, open your Quest app, then select “menu,” and then go to “settings,” go to “controllers,” and select “Pair new controllers.” Then it will ask you which controller you want to pair next. So, select the controller you want to pair with your headset.
Then an image of the controller should appear on your screen, and it should tell you to hold the button with three lines and the “Y” button on your controller, and then you should release the two buttons on your controller when you see lights flashing, and it begins to vibrate. Once the controller vibrates, it should be connected, and you can repeat the process for the other controller.
Because your controller will normally connect with your headset as soon as you turn them on and tap any button on the controllers, this procedure is only useful if you have a new controller to pair with your Meta Quest 2 or if you have hard reset or factory reset the controller.
Button Use Tips
Individual games and apps may include their own tutorials on how to use the various buttons on the controllers, but here are a few general ones that will usually work on most games.
The Oculus Button/Meta Button
Depending on what you call the device (don’t worry, either name works), the small button off to the side of the controller will make the menu disappear and reappear by pressing the Oculus button when you’re in your home world in the Meta Quest 2 headset.
When the menu has popped up, you can recenter it by pressing and holding the Oculus button for two seconds. This is also useful when playing games because you can stand in your preferred position and then recenter the menu so that it appears in front of you.
During a gaming session, you can bring up the shortcut menu by pressing the Oculus button once, and from there, you can quit the game, pause, or start a screen record.

The Grip Button
On the side of your controller, you have the grip button. Pressing it will allow you to grab objects with your virtual hand in games or other interactive sessions. The controllers work very intuitively in some games, so if you want to make a fist, you literally make a fist with your hand by grabbing both the side and front triggers and placing your thumb flat on the controller. You can make a thumbs-up by releasing your thumb from the first position.
If you put your thumb back down and release the front trigger and keep hold of the side trigger, you can point your finger. If you hold the front trigger and bring your thumb across the top of the controller to meet it, you have an “ok” hand single.
A, B, X, and Y Buttons
These buttons change from one game to the next, but they are usually teleport buttons, which are useful for moving from one position to another without getting motion sickness. There are some games, like In-Death Unchained, where you have to use the teleport method, and in some games, you can turn it on or off in the menus.
A quick bonus tip for those of you who are susceptible to motion sickness would be to use the teleport option to avoid it and use it whenever possible.
The Y, X, and A, B buttons can also be used as action buttons to crouch or jump, but you will be guided on how to use each of these buttons in each game, and they can also be used to skip long and boring storylines in games. Usually, you will need to hold it down for a few seconds until the graphic circle is complete to skip a story.
On the left controller, you have a round button with three lines on it. It is the menu button, and on some games, you can press the menu button, and it will bring up a menu that is specifically tailored to the game where you can make various changes to that game.
Taking a Screenshot
You can take a screenshot at any point in time by holding down the front trigger and the Oculus button at the same time. A screenshot allows you to record a funny moment or a new high score and share it with your friends at any time.
Recalibrating your Joysticks
If your joysticks aren’t very accurate on your controllers, you can recalibrate them from the universal menu. To do that, you will need to go to “settings,” then go to “experimental features,” then recalibrate the thumbsticks, and follow the onscreen prompts on what to do.
Conclusion
The controllers on Meta Quest 2 are great, and they are very intuitive to use. They are what help you to navigate and interact with the world around you in whatever game you are playing, and they are great to use.
The battery life on them is very impressive, and it is great that they come with the Meta Quest 2, so you don’t need to buy a pair once you have the headsets, but they are also sold separately if you need to buy another pair if yours get damaged. Thank you so much for reading this article. I hope you found all my tips very helpful and intuitive.
Related Post: