A computer driver is a group of files that facilitate communication between the operating system of your computer and particular hardware, such as a graphics card. Consider it a group of interpreters relaying orders from the administration of a plant to the operators of its machinery.
So, in this article, I’ll be taking you on an in-depth discussion on the kinds of drivers available on the Lenovo ThinkPad X1 Yoga Gen 6, what they do, how they interact with the system, and what kinds of drivers you can find on the Yoga Gen 6.
- Lenovo ThinkPad X1 Yoga Gen 6 Drivers and Software
- Lenovo ThinkPad X1 Yoga Gen 6 Drivers and Software
- Lenovo THINKPAD X1 YOGA 6TH GEN TYPE 20XY 20Y0 Advanced Firmware Drivers
- Lenovo THINKPAD X1 YOGA 6TH GEN TYPE 20XY 20Y0 Audio Drivers
- Lenovo ThinkPad X1 Yoga Driver Download
- How to Open Device Manager
- Final Thoughts
Lenovo ThinkPad X1 Yoga Gen 6 Drivers and Software
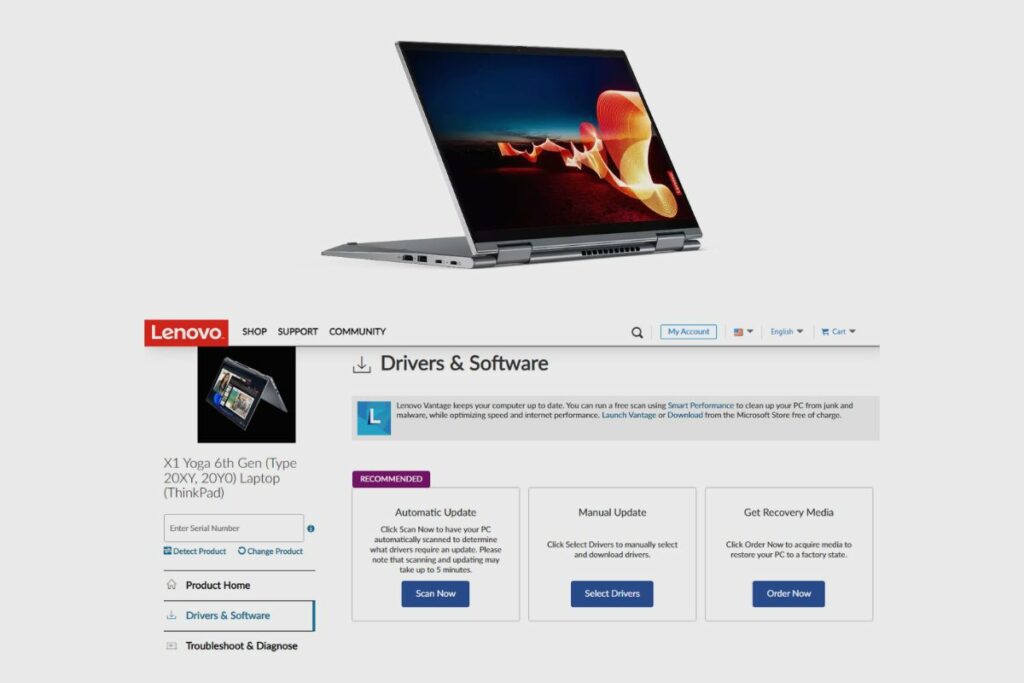
If you own a Lenovo ThinkPad X1 Yoga 6th Gen, it’s important to keep your device’s drivers and software up-to-date to ensure it operates smoothly and efficiently. Follow these steps to download and install the necessary drivers and software:
Step 1: Visit the Lenovo Support website
To get started, visit the official Lenovo Support website and select “Laptops & Netbooks” > “ThinkPad X Series” > “ThinkPad X1 Yoga 6th Gen (Type 20XY, 20Y0).”
Step 2: Navigate to the Downloads section
Once you’ve located your device, click on the “Downloads” tab and select “Driver List.” Here, you can choose which drivers and software you wish to download and instal.
Step 3: Select the correct operating system
Be sure to select the correct operating system and version for your device before downloading any files.
Step 4: Download the necessary drivers and software
Select the drivers and software that you need and click on the “Download” button to initiate the download process.
Step 5: Install the drivers and software
Once the files have finished downloading, locate the driver file and double-click to begin the installation process. Follow the on-screen prompts to complete the installation.
By following these steps, you can ensure your Lenovo ThinkPad X1 Yoga 6th Gen remains up-to-date with the latest drivers and software, allowing for optimal performance. Remember to regularly check for firmware updates to keep your device running efficiently.
Lenovo ThinkPad X1 Yoga Gen 6 Drivers and Software
Lenovo X1 Yoga 6th Gen (Type 20XY, 20Y0) ThinkPad drivers are necessary for maintaining the performance and functionality of the device. The Lenovo Drivers Download website provides an easy and convenient platform for downloading and installing these drivers.
Step 1: Visit the Lenovo Drivers Download website
Start by visiting the official Lenovo Drivers Download website and selecting “Laptops & Tablets” followed by “ThinkPad X Series” > “ThinkPad X1 Yoga (6th Gen)”.
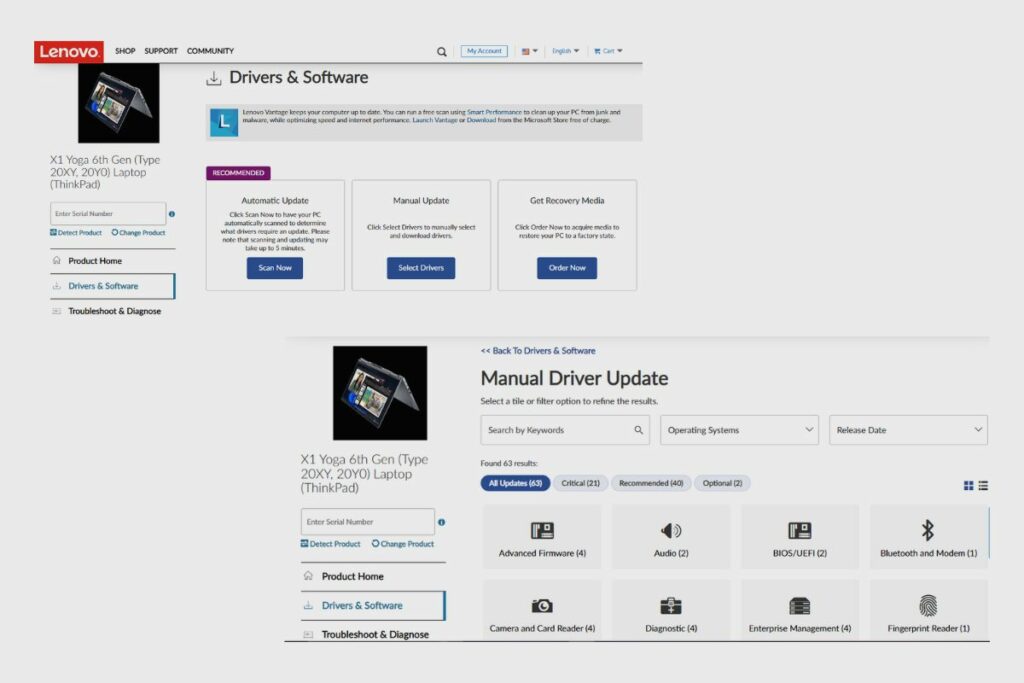
Step 2: Navigate to the Drivers panel
Once you have located your device, click on the “Drivers” panel located on the right side of the screen. Here, you can select the operating system, driver type, and component to download.
Step 3: Download the necessary drivers
Select the drivers that you require and click the “Download” button next to them. The driver files will begin downloading to your device.
Step 4: Install the drivers
Once the download is complete, locate the downloaded driver file in your downloads folder or default location. Double-click the file to begin the installation process. Follow the on-screen prompts to complete the driver installation.
Step 5: Install the driver through Device Manager
In some cases, drivers may need to be manually installed through the Device Manager. To do this, open the Device Manager, locate the device that requires the driver, right-click it, and select “Update Driver Software”. From here, select “Browse my computer for driver software” and navigate to the location where the driver was downloaded. Once the driver is selected, click “Next” to install the driver.
In summary, downloading and installing Lenovo X1 Yoga 6th Gen drivers from the Lenovo Drivers Download website involves navigating through the website and downloading the appropriate drivers. Following this, the driver files must be installed on the device, either by double-clicking the downloaded file or through the Device Manager.
Lenovo THINKPAD X1 YOGA 6TH GEN TYPE 20XY 20Y0 Advanced Firmware Drivers
Lenovo ThinkPad X1 Yoga 6th Gen Type 20XY 20Y0 Advanced Firmware Drivers play a crucial role in maintaining stable performance and enabling advanced functionality of your device. These drivers ensure that your device operates at optimum levels and is free from bugs or glitches. Given their significance, it is vital to keep these drivers up to date to enjoy the full benefits they offer.
To download the latest firmware drivers that are specifically designed for your Lenovo ThinkPad X1 Yoga Gen 6, visit Lenovo’s official website. Locate the dropdown menu on the website and select your device’s model from the list. The website will then present you with a list of available firmware drivers, including the Advanced Firmware Drivers.
Once you have downloaded the firmware update package, it is crucial to follow the installation instructions carefully. This will guarantee that the firmware update process is successful and that your device is performing at the most optimal level possible.
By keeping your Lenovo ThinkPad X1 Yoga Gen 6 Advanced Firmware Drivers up to date, you can enhance the device’s performance, minimise system crashes and malfunctions, and unlock advanced functionality features that are not available with outdated firmware drivers.
In conclusion, downloading and installing the latest Lenovo ThinkPad X1 Yoga 6th Gen Type 20XY 20Y0 Advanced Firmware Drivers can have a significant impact on your device’s performance. It is essential to keep these drivers up to date to ensure that your device operates at optimum levels and enables you to enjoy its full functionality.
Lenovo THINKPAD X1 YOGA 6TH GEN TYPE 20XY 20Y0 Audio Drivers
Lenovo’s ThinkPad X1 Yoga 6th Gen Type 20XY 20Y0 is a powerful and innovative device that requires high-quality audio drivers to provide the best sound experience possible. A reliable audio driver ensures that sound playback is smooth, without distortion or lag, and that the audio output quality is top-notch.
Lenovo offers a range of audio drivers designed specifically for the Thinkpad X1 Yoga 6th Gen Type 20XY/20Y0. To download the latest audio drivers, visit Lenovo’s official website and click on the Drivers & Software tab. Select your device model and filter the search results to display only audio drivers.
The available audio driver versions compatible with Windows 10 (64-bit) are 6.0.9087.0 and 6.0.9086.1. The former version includes Intel Smart Sound Technology, which enhances audio output quality, while the latter version incorporates Dolby Atmos Speaker System technology, which offers unparalleled immersive sound output. For Windows 11 (64-bit) users, there’s version 6.0.9166.1 that comes with enhanced features and improved performance.
In particular, the Realtek Audio Driver version is a popular option for Lenovo Thinkpad X1 Yoga 6th Gen Type 20XY/20Y0 users. This driver is compatible with Windows 10 and Windows 11 (64-bit) operating systems and provides advanced audio functions and features. It is optimised to work with the device’s built-in speakers, audio jack, and microphone array, delivering exceptional sound quality.
Installing the latest version of the Lenovo audio drivers on your Lenovo Thinkpad X1 Yoga 6th Gen Type 20XY/20Y0 can optimise the device’s audio performance and boost your overall user experience. Therefore, ensure that you download and install the correct version of the audio driver from Lenovo’s official website to ensure that your device is performing at its best.
Lenovo ThinkPad X1 Yoga Driver Download
Looking for the latest Lenovo ThinkPad X1 Yoga drivers? You’ve come to the right place! I’ll guide you through the process of downloading and installing the drivers you need to get your device up and running smoothly. From audio drivers to firmware updates, I’ve got you covered. So sit tight and read on to learn more about Lenovo ThinkPad X1 Yoga driver downloads.
Step 1 – Download Your Driver
When it comes to updating your Lenovo ThinkPad X1 Yoga Gen 6, downloading the right drivers is crucial. Before downloading, you’ll need to determine the preferred driver version and operating system that are compatible with your laptop.
Lenovo provides an online driver archive that contains all the available drivers for your laptop model. If the preferred version or OS is not available, the archive search is a useful tool to find specific drivers based on your requirements.
However, if you’re unsure which driver to download, you can use the Lenovo Driver Update Utility. This utility can automatically detect your laptop’s specifications and download the correct driver for you.
To make sure you’re always using the most up-to-date drivers, it’s best to visit the Lenovo website directly. They release new drivers regularly, so navigating to your laptop’s specific support page is recommended.
Overall, downloading the correct driver is a crucial step to ensuring your Lenovo ThinkPad X1 Yoga Gen 6 performs at its best. Utilise the Lenovo Driver Update Utility or navigate to the Lenovo website to find the most recent driver available.
Step 2 – Install Your Driver
After you have downloaded the driver for your Lenovo ThinkPad X1 Yoga 6th Gen model, the next step is to install it on your Windows system. To do this, you first need to open the Device Manager on your computer.
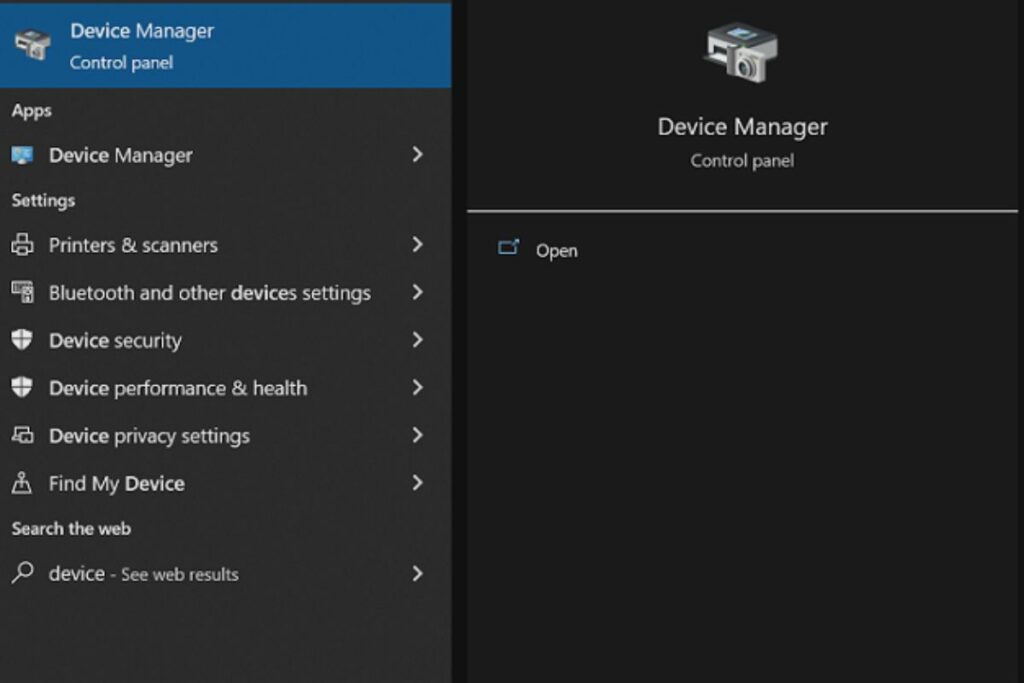
The Device Manager is a tool that helps you manage hardware devices connected to your Windows system. It enables you to view information about the device, its status, and associated drivers. To open the Device Manager, you can either search for it in the Windows search bar or use the keyboard shortcut “Windows Key + X,” followed by selecting “Device Manager” from the menu that appears.
Once you have opened the Device Manager, you need to locate the device and its associated driver that you wish to update. This can be done by expanding the relevant category of devices and locating the specific device that requires a driver update.
Once you have located the device, right-click on it and then select “Update Driver” from the context menu. This will open a new window that gives you two options for updating the driver: “Search automatically for updated driver software” or “Browse my computer for driver software.”
Since you have already downloaded the driver, select the “Browse my computer for driver software” option. This will take you to the next set of options, where you can select the location where the downloaded driver has been saved.
Navigate to the location where you saved the downloaded driver and select it. From there, follow the prompts to complete the installation of the driver. These prompts may vary depending on the device and driver you are updating. However, usually, they will include options like “Instal,” “Next,” “Finish,” or “Yes.”
Once you have completed the installation prompts, the device driver will be successfully updated. You can verify that the driver has been installed correctly by checking the device’s properties in the Device Manager and ensuring that the driver version is the updated one.
How to Open Device Manager
Device Manager is a built-in tool in Microsoft Windows that allows you to manage hardware devices and their associated drivers installed on your computer. Depending on the version of Windows you have, there are different ways to access and open the Device Manager.
For Windows 11, Windows 10, and Windows 8.1, you can simply right-click on the Start menu and, from the quick-access menu that appears, select Device Manager.
If you’re using Windows 8, swipe up from the bottom or right-click anywhere on the desktop to bring up the App Bar. Click ‘All Apps’ at the bottom of the screen and swipe or scroll right until you see the ‘Control Panel’ option. Click on it to open the Control Panel, then click on ‘Hardware and Sound,’ and finally, select the ‘Device Manager’ option.
Windows 7 users can access the Device Manager by clicking on the Start button and going to the Control Panel. From there, click on ‘Hardware and Sound’ and then click on ‘Device Manager.’
For Windows Vista users, you can open the Device Manager by clicking on the Start menu button and then navigating to the Control Panel. From there, click on ‘System and Maintenance’ and then select the ‘Device Manager’ option.
If you are using Windows XP, click on the Start menu button and then navigate to the Control Panel. From there, click on ‘Performance and Maintenance,’ followed by ‘System,’ and finally, click on the ‘Hardware’ tab. From there, you can select the ‘Device Manager’ button to open it.
In summary, regardless of the version of Windows you’re using, you can access the Device Manager in one of the above ways: either through the Start menu or by using the Control Panel and navigating to the ‘Hardware and Sound’ or ‘System and Maintenance’ options.
How to Install a Driver from Device Manager
Installing drivers from Device Manager is a straightforward process that requires a few clicks. Here’s how to do it:
Step 1: Locate the device and model that is causing the issue
The first step is to open the Device Manager and locate the device and model that are causing the error. To do this, simply right-click on the Start menu, select Device Manager, and navigate to the problematic device.
Step 2: Double-click on the device to open the Properties dialogue box
Double-click on the device to open the Properties dialogue box. From here, navigate to the Driver tab.
Step 3: Click the Update Driver button
Once you’re on the Driver tab, click the Update Driver button and follow the instructions provided in the Update Driver Software wizard.
Step 4: Restart your computer
In most cases, the driver update will require a restart. So once the update process is complete, restart your computer to finish the installation.
It’s important to note that different file formats have different installation processes. For instance, an EXE file can be easily installed by double-clicking on it and following the on-screen instructions. On the other hand, INF and SYS files need to be installed manually by following specific instructions.
In summary, updating drivers from Device Manager is a simple process that ensures your devices are functioning correctly. Remember to reboot your computer after installing the new driver to complete the process.
Final Thoughts
After reviewing the information provided, it is clear that the Lenovo ThinkPad X1 Yoga Gen 6 is a premium business laptop that offers an array of features targeted at professionals. The laptop boasts impressive security and privacy features that make it ideal for businesses dealing with sensitive information.
One highlight of the Lenovo ThinkPad X1 Yoga Gen 6 is its great display and efficient keyboard, which make it an excellent option for professional use. Additionally, the laptop’s Intel Core processors and Windows 10 operating system ensure that users can work efficiently.
However, the Lenovo ThinkPad X1 Yoga Gen 6 does have some drawbacks. It lacks an SD card reader, which could turn off some potential buyers. Furthermore, its high price may not be suitable for everyone.
In summary, the Lenovo ThinkPad X1 Yoga Gen 6 is a solid business laptop with a focus on security and privacy. Its high price point may not be for everyone, but its great display and efficient keyboard make it an ideal option for professional use.
Before purchasing, it’s important to consider the highlights and drawbacks carefully. The top 5 most relevant keywords for this section are Lenovo ThinkPad X1 Yoga Gen 6, premium business laptop, highlights and drawbacks, professional use, and high price.
Related Posts:
- Lenovo ThinkPad X1 Yoga Gen 6 Review.
- Lenovo ThinkPad X1 Yoga Gen 6 RAM Upgrade.
- My Lenovo ThinkPad X1 Yoga Gen 6 Won’t Turn On.
- Lenovo ThinkPad X1 Yoga Gen 6 Audio Drivers.
References:
- About the Lenovo ThinkPad.