
One of the best security cameras on the market is the Reolink Argus 3 Pro. It combines many high-end features with a stylish and lovely design. The most recent specifications include a 2K, 4MP camera, an improved battery, and AI person and vehicle detection.
According to Reolink, the 3 Pro is their most impressive design because it successfully blends simplicity and style with a lot of impressive features.
However, something that is becoming even more simple is the installation process for all of their cameras. So, in this article, I will be going through the Installation and mounting process for the Reolink Argus 3 Pro.

How Do I Mount a Reolink Argus 3 Pro
To mount the Reolink Argus 3 Pro, you will need a few tools and some mounting items. These are; the camera bracket or strap, screws, anchors, the mounting template, a hammer, an electric drill and a screwdriver.
Before you begin the installation process, you must identify the right mounting location based on the area that requires the most protection. It could be your front door, backyard, or even inside your home. There are also four ways to mount your Reolink Argus 3 Pro.
To install your security camera with a security bracket, you would need to place the mounting template on the wall to help with the installation. Then drill holes onto the specified points you have outlined using your mounting template. Then attach the other part of the bracket to the plate and turn the bracket clockwise to lock it in firmly. Then finally, you would need to screw in the camera to the bracket and lock it in position.
To start the installation process with a magnetic bracket, you would also need to put the mounting template on the wall first, then drill the holes into the outline you have drawn out and then screw in the backplate to the wall.
Then attach the other part of the bracket to the plate and turn the bracket clockwise to lock it in firmly. Then screw the camera to the magnetic base and attach it to the bracket.
If you are mounting the Argus 3 Pro to a tree, please make use of the mounting strap provided. To attach the mounting strap, you would need to thread the loop strap through the backplate and fasten the strap. Then attach the bracket to the plate and turn it clockwise. Then finally, you would need to screw the camera to the bracket and lock it in position.
If you intend on mounting the Argus 3 Pro in your home, you could use the stand bracket to put it on a table, bookshelf or any flat surface around the house. You can use the stand provided to keep an eye on your kids or pets.
Some Useful Tips to Get the Most Out of Your Installation.
- You also need to ensure that your security camera is in a place where Wi-Fi can reach it.
- To ensure the best performance of the camera, make sure you mount it at least 2-3 meters above the ground.
- You should place it in the direction crossing the direction of intruders.
- You should also avoid pointing it directly at the sun, mirrors or windows.
How do You Set Up a Reolink Argus 3 Pro?
To set up your Reolink Argus 3 Pro, you will need to install the Reolink app onto your phone or you should update your Reolink App from the previous version. Here is a step-by-step guide to setting up your Reolink security camera on your phone.
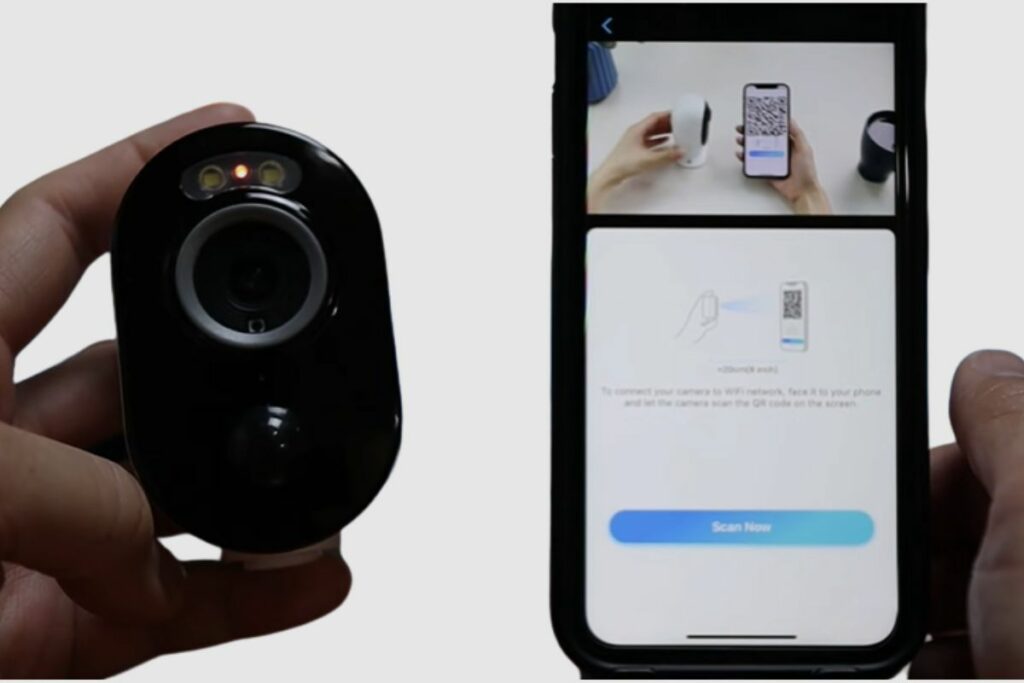
Firstly, you will need to add your camera to the Reolink App. So, you will need to open the Reolink app and tap the “add device button” on the top right corner.
Then scan the QR code on the bottom of the camera. If your phone doesn’t respond after scanning, you may tap “enter” on the page to manually type in the UID, which you can find right on the sticker at the back of the camera.
Then you can start to set up the Wi-Fi network. You will first select “Wi-Fi not configured”, and you’ll see the prompt “Please make sure the camera is powered and turned on”. If your camera is not turned on, you should turn it on.
Once turned on, you should hear a ding sound. After you hear the ding sound, proceed to your phone and tap on the “I have heard a ding sound from the camera”. If you did not hear the sound coming from the camera, tap on the “I did not hear anything” prompt and proceed to get help from Reolink’s customer support.
After that, you will need to tap next and enter the Wi-Fi password of the selected Wi-Fi network. If you want to connect to another Wi-Fi SSID, you may tap “Switch”. After that, you should input your password for the Wi-Fi network of your choice.
Then you’ll see a QR code on your phone, then point your camera’s lens to your phone to scan the code. Then wait till you hear a voice prompt telling you, “your connection is being processed”. After that, tap on the “I heard a beep sound” and then wait till you are told your connection was successful. Then tap “I have heard the voice prompt” and then tap next.
Finally, all you have to do is create a login password and username for the camera and finish the initial setup. Please note that your password must contain at least six characters. After that, you should be able to check the live view and play back recordings on your phone.
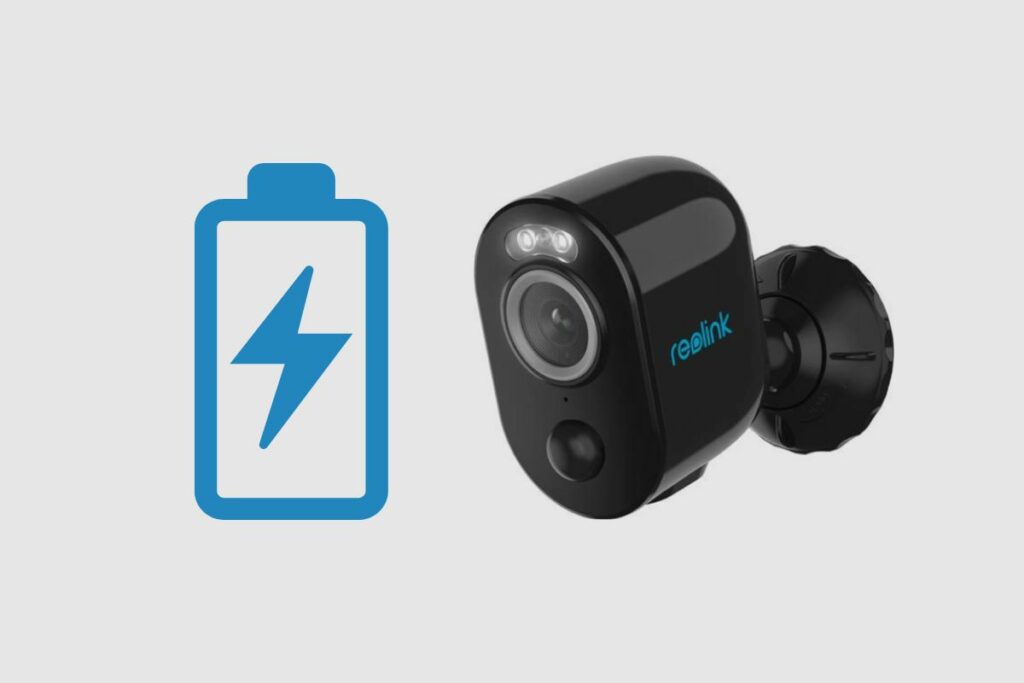
How Long Does the Reolink Argus 3 Pro’s Battery Last?
The Reolink Argus 3 Pro’s battery has an average standby life of about two months and a normal useful life of one to four weeks. The length of the battery life, however, is largely influenced by how you use the device as well as other factors like network strength.
Conclusion
The Reolink Argus 3 Pro is an excellent security camera with many of the best features and specifications. I like its 2k camera, which is one of the best cameras in its price range that I’ve found. It also has a very durable battery that lasts for a very long time.
I found the installation process to be very simple, and I hope you did as well. If you have any problems setting up your Reolink Argus 3 Pro or installing the Reolink Argus 3 Pro, please let me know in the comments section below.