
The basic input/output system, or BIOS, is the software that a computer’s microprocessor runs when it is turned on. Additionally, it controls the flow of information between the operating system (OS) of the computer and any attached hardware, including the hard drive, video adapter, keyboard, mouse, and printer.
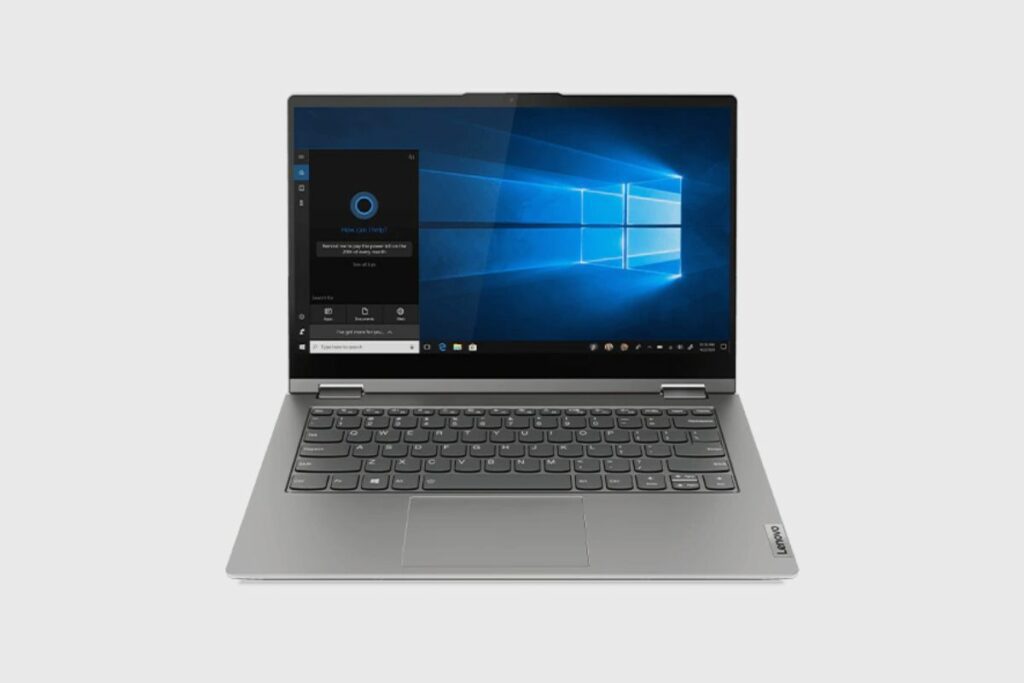
And I’ll demonstrate how to update the BIOS on your Lenovo ThinkPad 14s Yoga in this article.
How to update the BIOS on the ThinkBook 14s Yoga?
There are several methods you can use to update your BIOS on your Lenovo ThinkBook 14s Yoga, and I’ll show you all the different ways you can do it. However, update the system BIOS with caution. The BIOS or UEFI firmware may be damaged if the upgrade process causes the computer to freeze, crash, or lose power. As a result, the system won’t boot up.
There are three methods you can use to update BIOS:
- Automatic Updates
- WinFlash
- Update BIOS from Windows
Note: Where relevant, instructions regarding flashing the BIOS from a USB key are included in the readme text file that comes with the BIOS download. To see if your system has an ISO image that can be used with Linux, see the Drivers & Software page.
Automatic Updates
Using automatic updates that come pre-loaded when you update your laptop will update your BIOS, and that should handle any problems you may encounter.
WinFlash Update
Note: Various download alternatives can be available depending on the system.
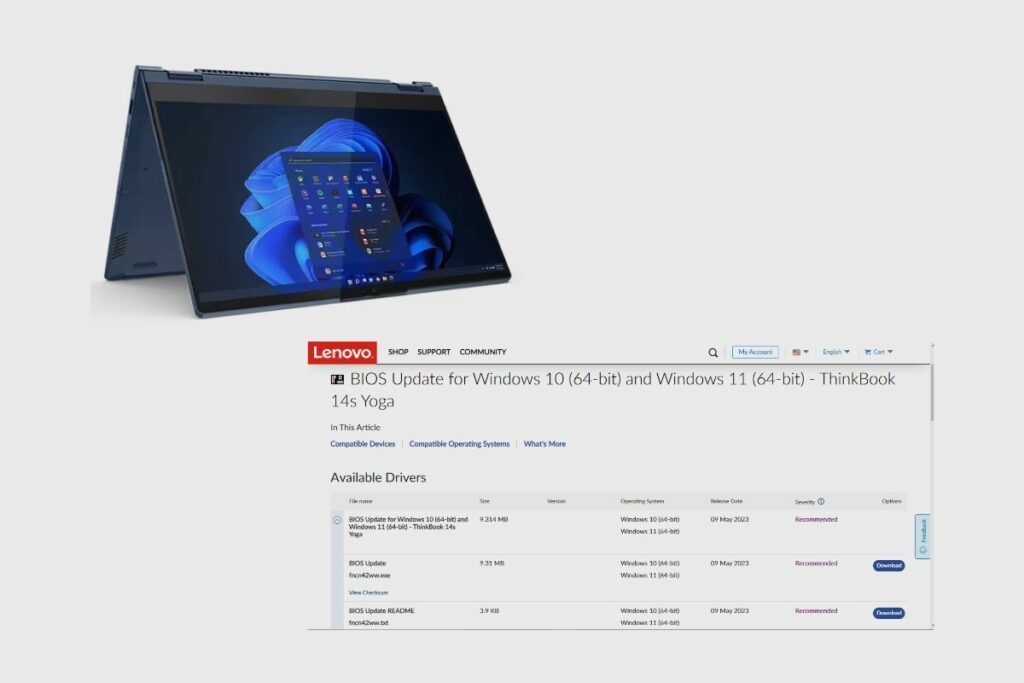
Step 1: For simpler use, download the most recent BIOS to the Windows Desktop. Follow these instructions to locate and download the BIOS:
- Launch the support.lenovo.com page on the Lenovo website.
- Type in the product name or machine type for the system.
- Simply select Drivers & Software from the product page.
- Filter by BIOS/UEFI, then select the appropriate OS details.
- As instructed in the readme file, download and install the BIOS.
However, if this step doesn’t apply to you, then you may attempt the following steps listed below;
To run as administrator, right-click the BIOS flash package and select Run. Note: In Windows Vista, running this programme by double-clicking the BIOS flash package will not work.
Click the Install button in the self-extracting window that Windows will display.
Select Flash BIOS from the menu.
To remind the user to connect the system power outlet and to display further flash information, a warning window will be presented.
Choose the OK option. The flashing BIOS update programme will launch automatically.
Please hold off until the BIOS update flashing programme has finished installing.
The system reboots automatically after the BIOS upgrade is finished.
Update BIOS from Windows
1. Where to locate and get the proper BIOS version for the system
It should be noted that the system might not function if a BIOS designed for a different system model is downloaded and installed. Launch the support.lenovo.com page on the Lenovo website. Product selection is followed by driver and software selection, BIOS selection, and operating system selection. View How To Navigate And Get Lenovo Software Or Drivers from the Support Site for further information on how to get drivers and software.
2. Examine the README files that are attached.
Review the README, which contains information on the BIOS Update Utility, if the following instructions for How to discover and download the correct version of BIOS were followed. Lenovo advises reading the README document.
There will probably be a list of fixes and new features in the BIOS update Read Me file, often to support new hardware and be unique to your model. Important details on the updating process and what to do or avoid are also included in these files.
3. Update the BIOS from Windows
Try to update the BIOS while connected to a dependable power supply, if at all possible. Make sure that a laptop’s or other portable device’s battery is fully charged before updating the BIOS. Because even a slight power fluctuation can ruin the BIOS while it is being updated, these safety measures are required. As a result, the computer can become useless.
It is best to turn off any active antivirus or security suite before updating the BIOS via Windows so that nothing gets blocked. The simplest option is to update the BIOS via Windows, which involves downloading the file, extracting it, and running the executable (the Read-Me file should offer comprehensive instructions). The BIOS is updated when the computer is restarted.
History of BIOS
In 1975, American computer scientist Gary Kildall first used the phrase BIOS. It was included in IBM’s first personal computer in 1981, and throughout the years, it gained popularity with additional PCs and, for a while, was a necessary component of computers. Unified Extensible Firmware Interface (UEFI), a more recent technology, has replaced BIOS as the more widely used operating system. By 2020, Intel declared that it would stop supporting outdated BIOS systems in favour of UEFI.
Uses of BIOS
The main use of BIOS is to act as a middleman between OSes and the hardware they run on. The BIOS is theoretically always the intermediary between the microprocessor and I/O device control information and data flow. Although, in some cases, BIOS can arrange for data to flow directly to memory from devices, such as video cards, that require faster data flow to be effective.
How does BIOS work?
The primary function of the BIOS is to serve as a liaison between operating systems and the hardware they use. The BIOS should always act as a conduit for data flow and control information between the microprocessor and the I/O device. Although in some circumstances, BIOS can set up devices, such as video cards, that require quicker data flow to function well to send data directly to memory.
A computer’s BIOS first checks to see if all required attachments are present and functional before booting it up. A boot device is any piece of hardware that contains the files required for the computer to boot up. The BIOS installs the operating system, or critical components of it, into the computer’s random access memory (RAM) from a hard drive or diskette drive (the boot device) after testing and confirming that boot devices are functional.
The four functions of BIOS
As soon as a computer is powered on, the BIOS locates, sets up, tests, and links computer hardware to the OS. The boot procedure refers to this sequence of actions.
These tasks are each carried out by BIOS’ four main functions:
- POST, or power-on self-test. Before loading the OS, this checks the computer’s hardware.
- loader for bootstrap. This helps find the OS.
- Software/drivers. Once the OS is up and running, it locates the applications and drivers that interface with it.
- The metal-oxide-semiconductor (CMOS) configuration is complimentary. Users of this setup programme can change the settings for the hardware and operating system. The non-volatile memory used by the BIOS is known as CMOS.
Accessing BIOS
The associated I/O devices do not need to be understood in great detail by the OS and its applications, such as computer hardware addresses. Only the BIOS programme needs to be modified when a device’s specifications change. This adjustment may occasionally be performed during system installation.
Through the BIOS Setup Utility, users can access the BIOS and customise it. Depending on the computer being used, different methods can be used to access the BIOS Setup Utility. To access and modify BIOS through the Setup Utility, users can often follow these steps:
- Switch the computer off or reset it.
- Look for a notification that reads “entering setup” or something similar when the computer restarts. There will be a key that the user can push to enter the system configuration along with that message. A user might see the following message, for instance: To enter BIOS setup, press [key]. Del, Tab, and Esc, as well as any of the function keys (F1–F12), are some keys that are frequently used as prompts.
- As soon as you see the prompt, swiftly push the designated key.
Users can alter hardware settings, manage memory settings, modify the boot order or boot device, reset the BIOS password, and do other setup activities once in the BIOS Setup Utility.
Conclusion
I hope that with the information I have provided you with, you will be able to update the BIOS on your ThinkBook 14s Yoga. Please feel free to ask any questions you may have, and I will get to them as soon as possible.
Image Gallery – How to update the BIOS on the ThinkBook 14s Yoga?
Related Posts:
References:
- About the Lenovo ThinkBook.