There are various reasons for upgrading a laptop’s maximum memory. Sometimes, you need RAM because you plan to carry out more memory-intensive activities like gaming or video editing, so you need extra memory, or you might not feel very comfortable with the amount of RAM on your Lenovo ThinkBook 14s, so you choose to upgrade it.
Sometimes it might just so happen that the storage space on your laptop is insufficient, especially if you are a gamer, a video editor, or both. You quickly begin to find yourself needing a lot more space on your ThinkBook 14s. So, if you plan on upgrading the RAM or SSD space on your Lenovo ThinkBook 14s, then this article is for you because I’m going to be showing you how to open your ThinkBook 14s, change the RAM, and add another SSD. So just follow this laptop memory installation guide, and you should be fine.

How to upgrade the memory on the Lenovo ThinkBook 14s Yoga?
Upgrading the memory / RAM and SSD on your Lenovo ThinkBook 14s Yoga is a straightforward process, and it doesn’t require that you have a master’s in computer engineering to open and swap out the pieces you need to make the necessary memory upgrades.
However, before you can open your Lenovo ThinkBook 14s, you will need a few tools. This includes a size 5 torx screwdriver and a size 1 Philips head screwdriver, a container to keep all the screws in, and a prying tool like a guitar pick or a flat clip. Once you have all these tools, you can now proceed to open the laptop and add additional memory and storage to your system.
Your computer’s memory capability
The ThinkBook 14s Yoga boasts an impressive memory capability, making it an ideal choice for multitasking and data-intensive tasks. It comes with 8GB of soldered memory pre-installed on the motherboard, providing a solid base for efficient performance. Additionally, it offers one SODIMM slot, allowing for easy memory expansion. By adding an additional memory module, users can increase the memory capacity up to a total of 40GB, thereby allowing them to make the necessary memory upgrades when needed.
In terms of storage, the ThinkBook 14s Yoga features two M.2 PCIe x4 slots. This offers flexibility in terms of storage options and allows for fast data transfer rates. Whether you need to store large files, run resource-intensive applications, or multitask seamlessly, the ThinkBook 14s Yoga has you covered.
Expanding the memory on the ThinkBook 14s Yoga is a straightforward process. Simply locate the memory slot, carefully insert the memory module, and secure it in place. It is essential to ensure compatibility by using the correct type, voltage, and maximum supported memory, as stated in the device specifications.
With its powerful memory capability, the ThinkBook 14s Yoga enables users to tackle demanding tasks with ease and efficiency. Whether you’re a business professional, student, or creative, the ThinkBook 14s Yoga offers the memory and storage capacity you need to excel in your work.

How do I upgrade the RAM on the Lenovo ThinkBook 14s Yoga?
Upgrading the RAM on your Lenovo ThinkBook 14s Yoga is a very simple process, and if you follow this memory installation guide, you should be able to change or upgrade the RAM on your Lenovo ThinkBook 14s.
The first thing you are going to want to do is make sure that your laptop has been turned off completely and is not connected to the charger. You can also press the power button a few times to remove static electricity. The next thing you should do is remove the active pen from the laptop and proceed to push the laptop against a wall. This is because the screws are placed at a slight angle, and you need a bit of leverage to remove the screws.
Once that has been done, you will notice that there are ten screws at the back of your Lenovo ThinkBook 14s; six screws are arranged around the centre of the laptop, and four screws are arranged around the exterior and edges of it. For the exterior screws, you will need to take out your size 5 torx screwdriver, remove each exterior screw, and place them in your container so that you don’t lose them.
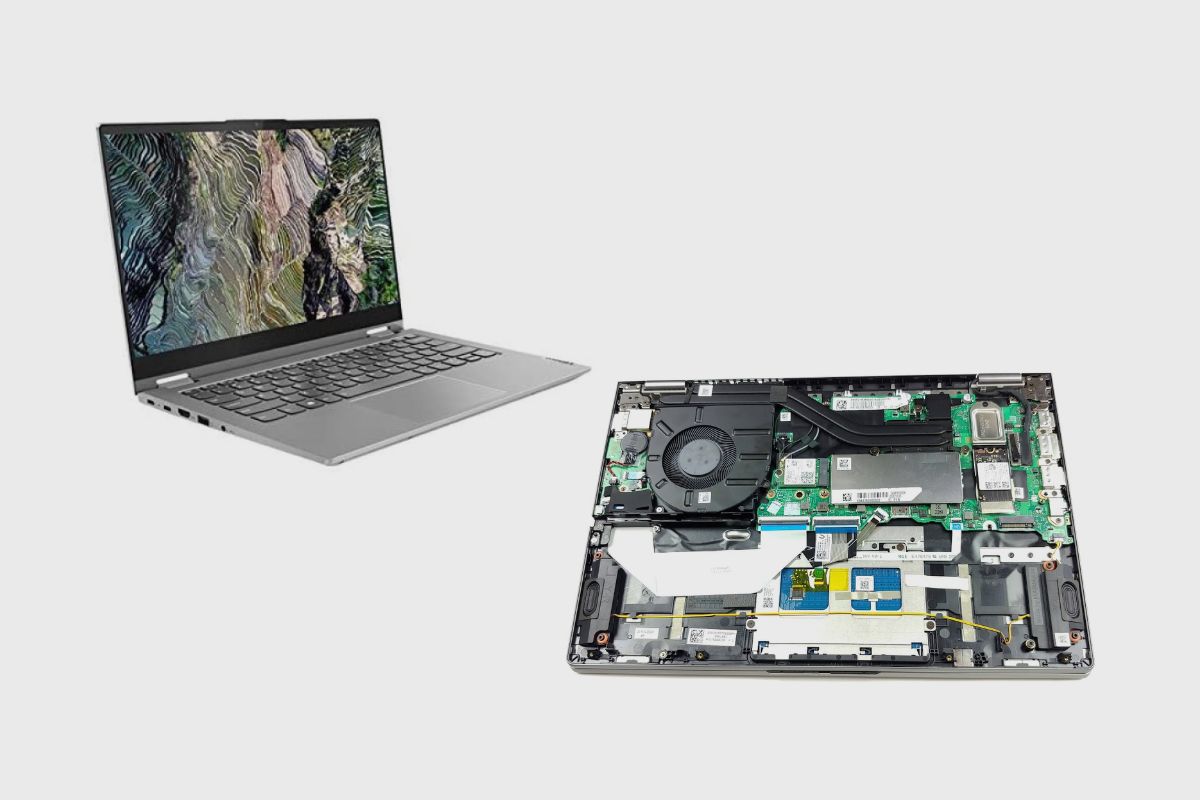
After that, you can then proceed to remove the centre screws; however, these screws don’t come off, so just unscrew them and proceed to use your prying tools to remove the bottom cover plate. Once you have removed the cover plate, you should be looking at the internals of the laptop. You should be able to see the heat sensor and laptop fan, as well as the 65-watt battery. The internal SSD is to the left of your memory slot, and just below it is the secondary SSD slot, which is not attached to the motherboard.
Once you have had time to look at the internals of your laptop, you can move straight to changing the RAM on it. Also, I think it is worth noting that if you want to change the RAM on any laptop, it is always good to check online to see if your RAM is soldered to the motherboard because if it is soldered, it can’t be replaced or upgraded.
The memory type on the Lenovo ThinkPad 14s Yoga is a single-channel board with 8GB of RAM soldered to the board, and the single channel contains a RAM slot that you can change and expand with up to 32GB of RAM.
The RAM slot is covered by a silver heat shield and can be located above the battery pack and between the Wi-Fi card. To remove the heat shield, simply pull on the heat shield, and it should come off. Once it comes off, you should see the RAM. Simply push down gently on the RAM until you hear it pop. Then, slowly remove the factory-installed memory and replace it with the amount of RAM that you want. Once that is done, you can place the heat shield back on top of the memory slot and then proceed to close up and screw your laptop back in place.

How do I upgrade the SSD on the Lenovo ThinkBook 14s Yoga?
Upgrading the SSD on your Lenovo ThinkBook 14s Yoga is a fairly simple process, and you should be able to alter or update the SSD on your Lenovo ThinkBook 14s if you follow our SSD installation guide.
The first step is to ensure that your laptop has been totally shut off and that it is not connected to a charger. The next step is to take the active pen from the laptop and push it against a wall. This is due to the screws being installed at an angle, requiring some leverage to remove them.
After that, you’ll discover ten screws at the back of your Lenovo ThinkBook 14s, six of which are grouped around the middle of the laptop and four of which are arranged around the outside and sides. Take out your size 5 torx screwdriver for the exterior screws, remove each external screw, and store them in your container so you don’t lose them.
After that, remove the centre screws; unfortunately, these screws do not come off, so simply unscrew them and use your prying tools to remove the bottom cover plate. After removing the cover plate, you should be able to inspect the laptop’s internals. The heat sensor and laptop fan, as well as the 65-watt battery, should be visible. The internal SSD sits to the left of your memory slot, and the secondary SSD slot, which is not connected to the motherboard, is right below it.
The internal SSD can’t be replaced, but the secondary one can be removed. All you have to do is take your Philips head screwdriver and remove the screw just below the SSD. Once you remove the screw, you can then proceed to take out the factory-installed SSD inside and replace it with a new one. Once that is done, you can screw down the new SSD and then proceed to close up and screw your laptop back in place.
Conclusion
I hope I have been able to show you how to correctly change the memory and storage on your Lenovo ThinkBook 14s Yoga. The replacement and upgrade process is very straightforward and shouldn’t give you any trouble. However, if you are having any issues and don’t know what to do, you can always contact Lenovo’s support team, or please feel free to leave a question in the comment section below, and I’ll help you out as soon as I can.
Related Posts:
Resources: