
The Meta Quest 2 is one of the most commonly used VR headsets worldwide. This is because the Meta Quest 2 offers a premium VR experience with features and capabilities that are unmatched by other VR headsets, and it has been described as a premium all-in-one VR experience.
Virtual reality (VR) gaming has been one of the biggest additions to the Steam catalogue of titles, with many PC gamers now taking advantage of their computers’ ability to connect with VR headsets to play VR games. So, naturally, every Meta Quest 2 owner would like to access Steam’s impressive gaming library.
Unfortunately, Steam is not available on Meta’s app store, which makes it hard for Quest users to play different games outside of Meta’s ecosystem. However, there are several different workarounds that Meta Quest 2 users can take advantage of to play games from Steam’s major gaming libraries, and in this article, I’ll be showing you how to use those workarounds to play games on Steam.
Does Meta Quest 2 Work with Steam?
Unfortunately, Steam does not have a native app or natural connectivity options for Meta Quest 2 users. This is because the Steam app is not available on Meta’s app store. This also means that Meta Quest 2 gamers don’t have access to Steam. So, they have to use different workarounds to play games on Steam, and there are two major workarounds they can make use of.
There is a wireless connection method that allows Meta Quest users to play games directly from Steam without a laptop, and there is also a wired connection that allows Meta Quest users to make a direct connection with their laptops and play games from their Steam accounts on their PCs. The wireless connection makes use of apps like Plutoshere or Air Link, while the wired connections make use of a link cable that is purchased separately from the Meta Quest 2 headset.
How to use a Link Cable to Play games on Steam with a Meta Quest 2
To connect your Meta Quest headset to a PC using Meta Quest Link, first download the desktop application for your PC by selecting Download Software from the drop-down menu that appears beneath Air Link and Link Cable on the Meta Store website. You should go over the Link compatibility requirements and double-check the following items:
Your PC meets the requirements.
You’re using a high-quality USB cable that can transfer data as well as power.
Both your PC and headset software are up-to-date.
Once you’ve checked these criteria, you can begin using your Meta Quest headset with this link:
For your PC:
- Click Download Software to get the PC application. Connect the Air Link and the Cable.
- Start the desktop programme on your computer.
- You should have your headset on.
- Connect one end of your USB 3.0 cable to the USB 3.0 port on your computer and the other to your headset.
When wearing your headset:
- A universal menu will show after you put on your headset and press the corresponding controller.
- Click and hold the clock on the left side of the global menu. Select Quick Settings when it appears.
- Scroll down to Quest Link after you’ve selected System.
- Select Launch Quest Link or Quest Link from the quick settings menu to open the Quest Link dialogue.
- To access the Link, flip the switch next to Quest Link. It should now be accessible from the quick settings menu as well.
Once you have established a wired connection between your PC and Meta Quest headset, you can now play VR games directly from your PC’s Steam account. Now you can play games like Half-Lyf Alex and Run Gunner
How to get Steam on Meta Quest 2 Without a PC
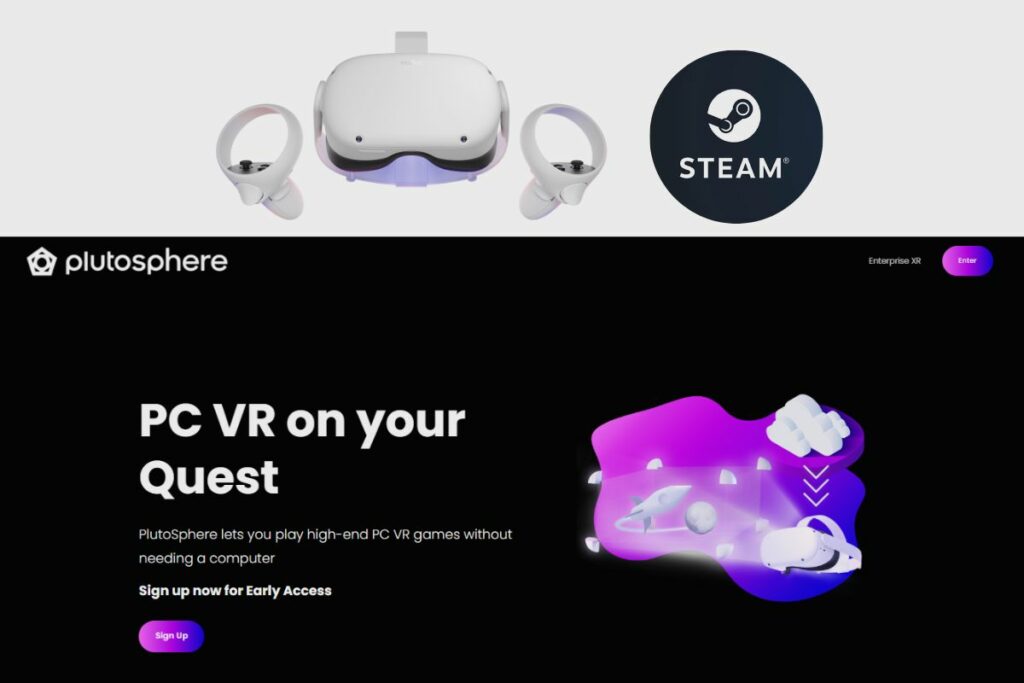
The best way to connect your Meta Quest 2 to Steam without using a PC is to download the Plutosphere app onto your phone.
However, getting Steam to work on your Meta Quest 2 is not an easy process, and it involves you utilising a few workarounds to get it to work. However, if you are patient, you can get Steam to work well on your Meta Quest 2.
Getting started with PlutoSphere
Using the pre-installed Steam VR shop on their app, Plutoshpere’s users may access VR games. These VR games can then be streamed using their virtual cloud PC, which is powered by Amazon Web Services. PlutoSphere uses cloud computing to give customers access to a virtual PC for a monthly subscription price. Users will be able to stream PC games onto their VR headsets and utilise their cloud technologies as a result.
PlutoSphere Requirements
Make sure you have a 5 GHz Wi-Fi 6 router and that your headset is linked to the router before you start using PlutosSphere. By selecting your Wi-Fi connection and connecting to your router while clicking on settings in the headset’s left-hand menu, you can see if your VR headsets are linked to your WiFi.
Then, to avoid latency and stuttering while streaming VR games, you must have an internet connection with a speed of at least 50 Mbps. By visiting speedtest.net and beginning a speed test, you can check your internet speeds on Quest 2 to see how quickly they are.
Finally, check to see if your PING time to an Amazon Web Services region is 75 ms or less. By visiting cloudping.cloud/AWS and waiting until the PING speed test is complete, you can test it on your Oculus Quest 2. Since CloudFront does not count, if the time it takes for everything to load is less than 75 ms, you should be fine.
You can register for a PlutoSphere account and link it to your Meta Quest 2 using your smartphone or tablet. So, here’s how to get going:
How to Create a PlutoSphere Account
To create a Plutosphere account, you must visit the PlutoSphere website to register for one. Please make sure that any add-blockers on your browser are disabled because they interfere with one another and damage the PlutoSphere website. When you log in to your account on the main dashboard after creating it, you must first verify it by entering your phone number and the verification code you will receive by text.
You must have Pluto tokens on hand; if you don’t, you can purchase some by clicking the “Get Tokens” button. After providing your Pluto username, you will be able to purchase some tokens for $2 for 600 tokens, which is equivalent to around an hour of use. At the top right of your dashboard, you can view your tokens once you have any.
After that is finished, return to the Pluto dashboard and select “Start” from the menu. Your virtual PC should then be built, complete with all the tools required to launch SteamVR right now. This procedure can take anywhere from ten to fifteen minutes, but you can monitor how it’s going by looking at the information bar, which says “booting up” and then “connecting.”
Downloading PlutoShere to your Meta Quest 2
On your Meta Quest 2, you must download and install the PlutoSphere program. You can do this by connecting your Quest to your PC with a USB-C cord. Continue after SideQuest has launched and connected to your PC.
Then, after finding PlutoSphere using your browser, click the “Download app” button to start the download and installation process. Then wait until it’s finished. Then search for PlutoSphere among the programmes you currently have installed. Once the PlutoSphere package has finished downloading, it will become visible.
As soon as that happens, you must return to your Pluto dashboard on your phone or tablet and see if the status has changed to “connected.” You can move forward if it has. The next step is to click the button that has a small computer icon on it.
Then, within 30 seconds, a secondary browser tab with your virtual PC should open. You ought to get a pleasant welcome message that you can dismiss. After completing that, you ought to see what resembles a typical Windows PC.
Except for the blue bar at the left that you can click on to get various editing options for your virtual PC, like setting the video quality for VR, and the button at the bottom of the bar that you can click to bring up your keyboard should you wish to type anything.
Launching Steam
Launch Steam on your virtual browser now, followed by Steam VR to enable use with your VR headset. When you’re ready to play a game, visit Steam and download and install it.
After that is finished, you may activate Plutosphere by clicking “Apps,” choosing “unknown sources,” and then finding it in your VR headset’s search bar.
After that, it will prompt you to connect to your Plutoshpere account, but you only need to do so once. Your Oculus web browser will then open.
After you log in, you should see the words “registering Pluto device,” followed by “success.” If you launch Pluto and nothing happens, make sure you don’t have any other browsers loaded on your Quest because they will conflict with the Pluto app and prevent it from running. Once that is completed and you receive a “success” notification, return to your app library and re-run PlutoSphere.
After a few moments, you should hear lift music and see a black screen. Then SteamVR should launch, and you should be able to select any game that has been installed. Restart your Meta headphones and try again if all you hear is the lift music and the app shuts down.
How to Use Air Link to Play Steam Games on Your Meta Quest 2
There are two major ways to connect your Meta Quest 2 to your laptop: with an Airlink connection and using Virtual Desktop.
Using Air Link
Just a brief note: Earlier this year, the Windows 11 update caused some performance concerns for Air Link users. If you wish to play PC VR content on Meta Quest 2, I strongly suggest against using Windows 11 until the issue is resolved.
The approved method for playing PC VR material wirelessly on Quest is the beta version of Meta’s Air Link software for the Oculus PC client. Initially limited to Quest 2, it was made available for Quest 1 as well in the v30 software patch.
Keep in mind that depending on your individual setup and network hardware, Air Link performance and reliability may be unstable or fluctuate.
What You Will Need
To run Air Link with your PC and Quest 2, you will need the appropriate software and a Wi-Fi router.
Software that is Needed
Downloading the official Meta PC app, which is the program that will make Meta Link work, will let you play PC VR games on your headset. Additionally, ensure the most recent software updates are installed on your Quest. The options section for the headset has a checkbox for this.
A Wi-Fi Router
Air Link requires a powerful Wi-Fi router and a continuous internal network connection to operate successfully, just like a Virtual Desktop. As suggested by Meta, use a 5 GHz network powered by an AC or AXE router. Furthermore, it is suggested that an Ethernet cable be used to physically connect the PC hosting the games to the router because Wi-Fi is known to cause connectivity problems. Furthermore, Meta warns that mesh networks can obstruct Air Link.
Setting Up Air Link
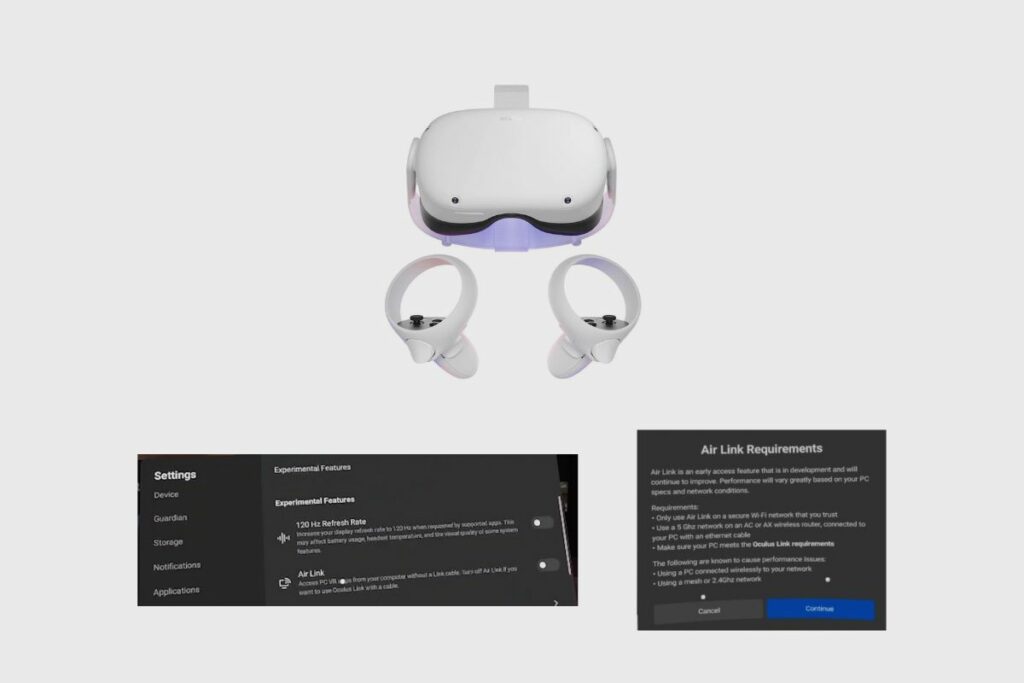
The Air Link on your Quest needs to be turned on first. Go to Experimental Features in the Settings section of your quest to accomplish this. On this tab, there will be a switch to turn on Air Link. You must also make sure that your computer is connected to your router.
A dialogue box will show up when you turn on Air Link, advising you of the configuration and equipment needed. Click Continue.
Once enabled, you may access Air Link from the Quest’s Quick Settings menu by clicking on the taskbar’s bottom left corner, as seen in the screenshot below.
The first time you launch Air Link, you must pair it with your PC. From the list of connected networked devices, select your PC. Additionally, you might need to confirm a pairing code that your computer displays to you.
Starting Air Link
Once engaged and paired, Air Link can be started whenever you want from the Quick Settings menu in the Quest toolbar. As long as your desktop computer is powered on and the Oculus software is running, you should be good to go.
Playing PC VR games should proceed precisely the same way, using a PC VR headset or a cable Oculus Link connection once Air Link has started. Enjoy!
Adjusting Air Link Refresh Rate and Rendering Resolution
When Air Link is activated, you can choose between 72 Hz (the default and suggested option), 80 Hz, 90 Hz, and 120 Hz refresh rates. This option is available to Quest 2 users; content can only be played back at 72 Hz on the first Quest.
To do this, use Air Link to connect your Quest 2 to your PC, then open the Oculus PC app and select the Devices tab.
A sidebar with settings will appear if you click on the active Quest headset. To change the rendering resolution and refresh rate, click Graphics Preferences as shown above. If you set these options too high, your PC’s performance may suffer. This depends on your computer’s hardware and, presumably, the game you’re playing. Make the appropriate adjustments after testing your settings.
Personal Thoughts
Once you have established a wireless connection between your PC and Meta Quest 2, you can then play games directly from your Steam account on your PC.
Final Thoughts
Getting Steam to work on your PC is a very simple task. You may not be able to get Steam directly onto your Meta Quest 2 headset since it is not available on the Meta App Store, but if you use the three workarounds I have listed for you, you should be able to play Steam VR games on Meta Quest 2.
Related Posts:
Resources: