The Acer Aspire 5 laptop is a solid, budget-friendly, and versatile laptop that is great for office workers and students. It is a good-looking laptop with an aluminium build that allows its users to get the most out of their tasks and projects. In this article, I’ll be trying to upgrade the 8GB of RAM on the Acer Aspire 5 laptop.
Fortunately, the RAM is set for dual channel, but it also splits the 8GB RAM into 4GB RAM, which gives you limited memory space for complicated tasks like the Acer Aspire 5 because the onboard graphics card takes up a lot of the memory on the laptop. So, if you want to game or edit videos, you might want to upgrade the RAM on your Acer Aspire 5 laptop to at least 16GB of RAM to get more out of your laptop.

What Tools do I Need to Upgrade the RAM on My Acer Aspire 5?
You will need a few tools to upgrade the RAM on your Acer Aspire 5 laptop, but they are not difficult to get your hands on. The first thing you will need is a simple cross-headed screwdriver (preferably a magnetic one) and a cloth to protect your laptop’s surface, seeing as it is made of aluminium and will scratch easily. You will also need a flat-head screwdriver to remove the RAM itself, but be careful not to scratch the RAM.
How to Add Ram to an Acer Aspire 5 Laptop
Upgrading the RAM on your Acer Aspire 5 laptop is a simple process, and it does not require a lot of technical knowledge to do it. So, the first thing you need to do is lay down your cloth as a protective surface line to protect the top of the laptop (the top of your laptop is made of aluminium, and it scratches easily, so please be careful with it).
Then you can flip the laptop onto the protective surface and begin to unscrew the ten screws on the back of your Acer Aspire 5 laptop. There are nine screws all around your Acer Aspire 5, and then there is one in the middle. Then you can proceed to use your crosshead or Philips head screwdriver to remove the screws on the back of your laptop.
Once that is done, you can take off the back panel of your laptop, but be careful with it because it is made of plastic, and you could break it if you are not gentle with it. You can also use a plastic clasp remover to slowly take the back off your laptop, but you could also use your fingers to do it.
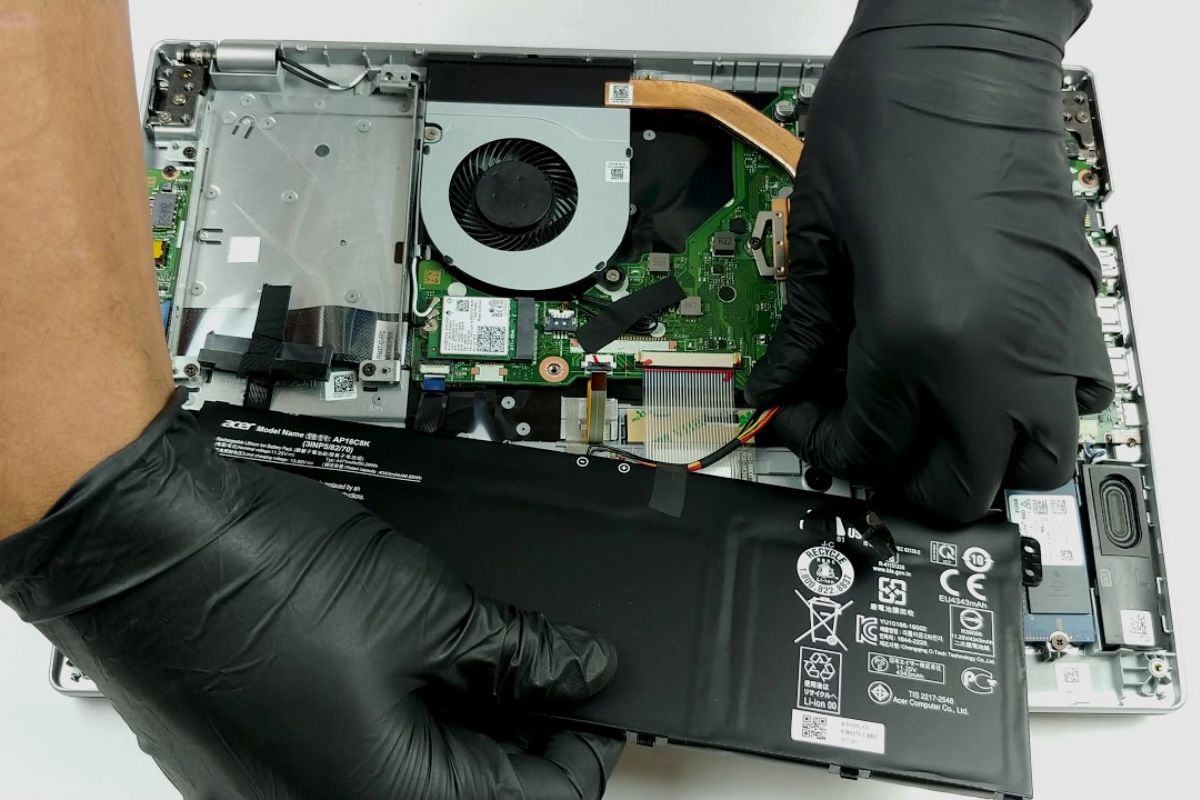
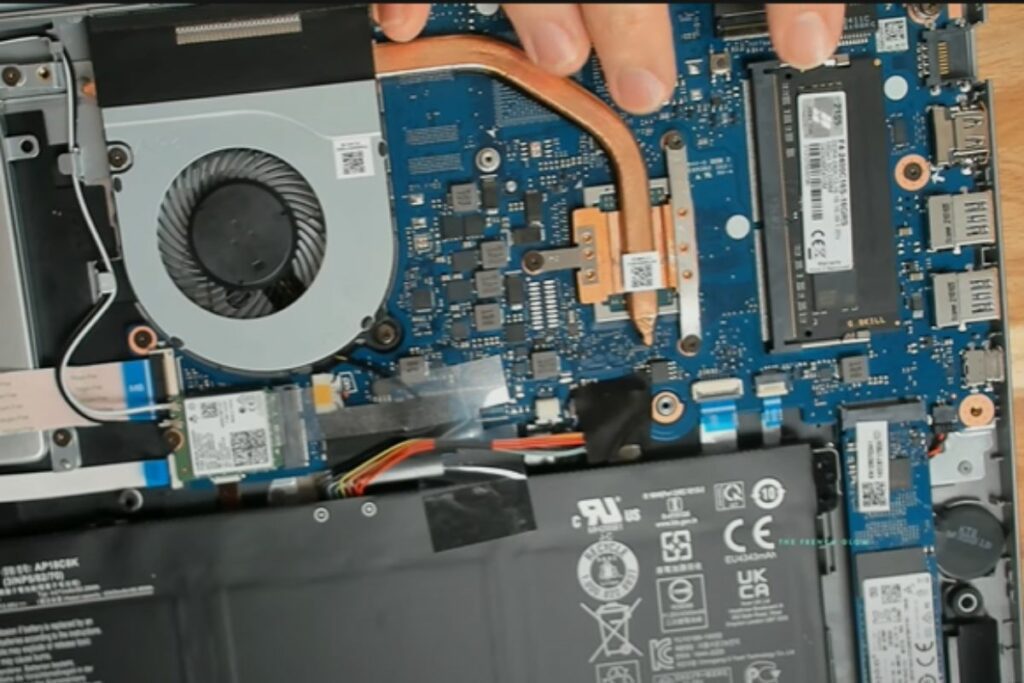
Once the back of the laptop is removed, you should be able to see the whole internals of your laptop, from the cooling fan to the battery pack, the hard drive, the RAM and even the motherboard. Everything is visible to you once you remove the cover from the bottom of the laptop.
The dual-channel RAM slots are on the left-hand side of your laptop, right next to the cooling fan and heat sink. To remove the RAM from your laptop, simply pull apart the sides of the RAM, and it should pop out, allowing you to remove the RAM.
To put the new RAM into your laptop, you must put the key to the RAM into the slot and then push it down till you hear it click into place.
Then do the same with the second stick of RAM. After that, your RAM should have been upgraded, and you should now have 16GB of RAM, which should be more than enough to allow you to do almost anything on your laptop. So after that, you can then reassemble your laptop and power it back on.

How to Install an HDD or SSD in My Acer Aspire 5 Laptop
It’s easy to upgrade the HDD on your Acer Aspire 5 laptop. All you have to do is first remove the ten screws holding the Acer Aspire 5’s back. Your Acer Aspire 5 is secured with nine screws on each side and one in the centre. The screws on the back of your laptop can then be removed using a crosshead or Philips head screwdriver.
After that, you can remove the laptop’s back panel, but be gentle when handling it because it is made of plastic and could break if you are not. You can also slowly remove the back of your laptop using a plastic clasp remover.
The internals of the laptop is exposed once the cover is removed, and you can see everything inside the laptop. On the right side of your cooling pad, your HDD is right next to the cooling fan. From there, you should see the HDD tray already screwed into the SATA connector, and just beneath the chassis is the connection ribbon. The connection ribbon connects the SATA connector to the motherboard. It is linked to the HDD’s main unit and the motherboard’s end.
So, the first thing to do is remove the holder or the caddy by removing the four screws on the HDD holder, and then you can take it out of the motherboard. So, once the HDD caddy is out, you will need to take out the HDD and then place the new HDD onto the holder and screw it onto the caddy.
Then lift the SATA connector and connect the HDD to it, and then press down the second ribbon to the SATA connector on the motherboard. Then you can place the cover of the HDD, connect it, and screw it down to cover the HDD. Once that is done, you can proceed to cover the laptop and reassemble it. Then, turn on the laptop and navigate to Windows to configure it with your new HDD. Please note that the same process applies to connecting a new SSD to your Acer Aspire 5.

How do I Configure My Acer Aspire 5 Laptop when I Install a new HDD or SSD on it?
Configuring your Acer Aspire 5 laptop when you install a new HDD or SSD is a simple process. All you have to do is go into your Windows OBS. The first step is to see if the system has recognised the HDD or SSD. You can do that by going to the device manager, and then you can look at your drives and see if they have been recognised. The name of the HDD or SSD should be visible if it recognises the HDD.
If your laptop recognises your HDD or SSD, you can then allocate some space to it. The first step is to right-click on the Windows bar and select Disc Management; you should then see the initialised disc information.
Then you can choose the new drive after you have installed it, right-click on it and allocate it a drive letter, and then follow the instructions provided to you by the on-screen prompts to assign the drive a letter, and then perform a quick format on the drive, and then, once it has been formatted, the drive should become available to you.
Once it has been installed onto your system, you can check on your file management system and see if it is actually registering on your device with the letter you assigned to it. After that, you can use the drive as you see fit. However, if the driver does not register on your laptop, you may have to go through the configuration and allocation process again.
Conclusion
Installing a new RAM, HDD, or SSD is a straightforward process, and it doesn’t require a lot of technical know-how from you to get done. So, as long as you follow the simple instructions I have provided, you should be able to install either a new drive or more RAM whenever you want to. Thank you so much for reading this. Please, if you have any questions, leave them in the comments section, and I’ll get to them as soon as I can.